Select Your Site Area


Sell on Bricbay – Reach Local Buyers Online.

Are you a shop selling  plumbing, or electrical items or any other building materials?

Bricbay.com connects local buyers with trusted vendors like you. Now get online orders from nearby areas without needing to create a website or spend on ads.

Why Sell on Bricbay?

  • Reach More Customers
    Buyers from your area (like Mathikere, Malleshwaram, etc.) will see only your products — no big chains to compete with.

  • Free Listing
    No joining fee. List your products and start receiving enquiries.

  • Bulk Order Support
    Add bulk pricing and get orders from individual builders, small contractors, or customers.

  • We Help You List
    Don’t worry if you don’t have all product details. Just share product names or photos via WhatsApp — we’ll set it up for you.

  • Fast Local Delivery (Optional)
    We help you reach the customer through local delivery partners (if enabled in your area).

Steps to create a vendor account.

" In Mobile creating a vendor account is same as in PC/Laptop but with slight changes which is mentioned below along with the process. "
In PC/Laptop :
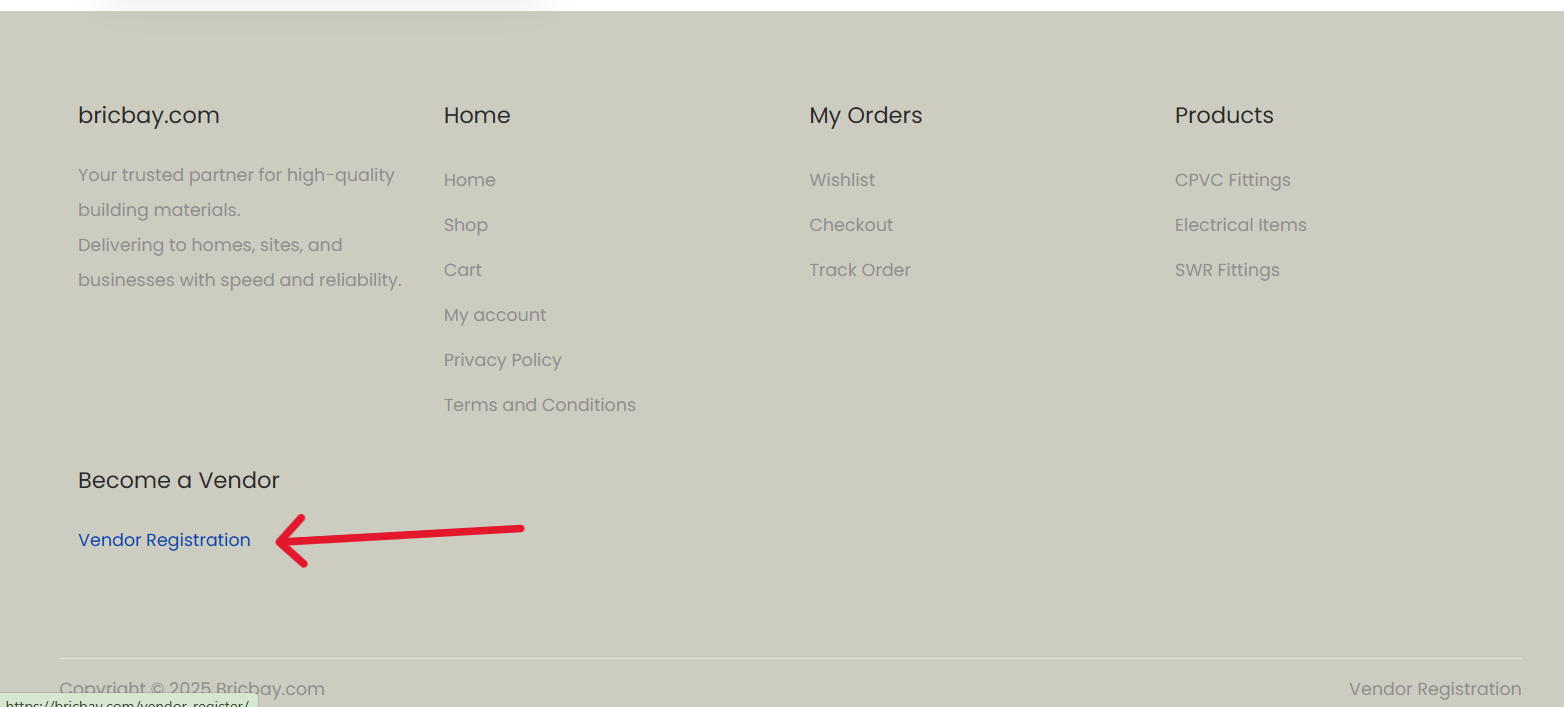
1. Scroll down to the bottom.

Click on the vendor registration
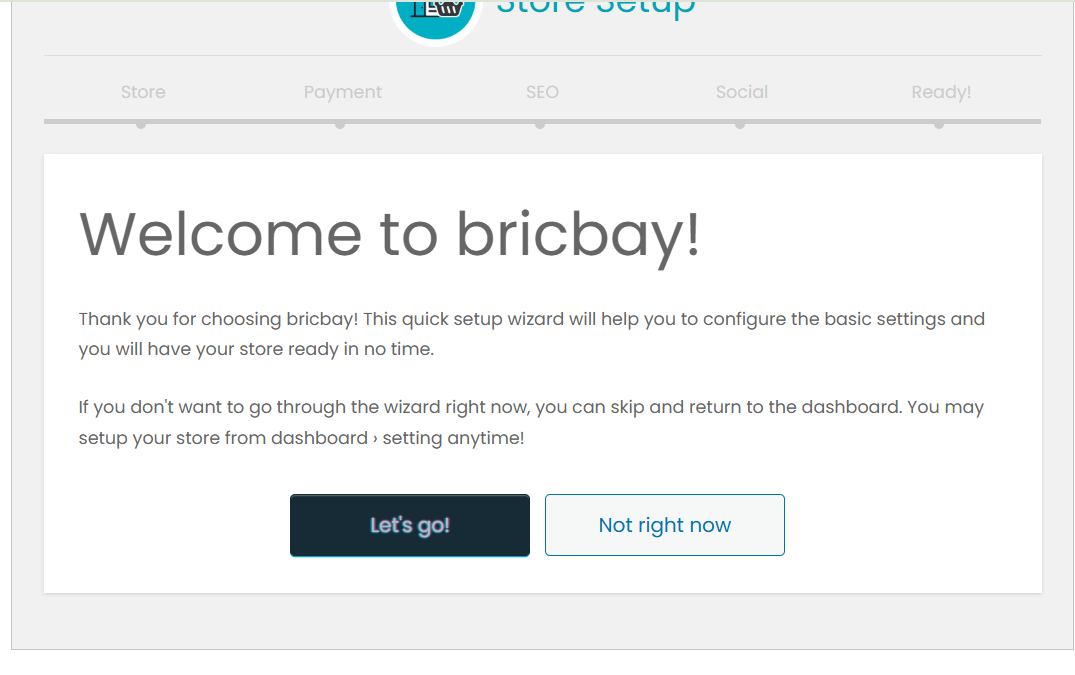
2. Fill out the form.
  • Enter your email address.
  • Enter/select your shop area.
  • Set a strong password.
  • Click Register.

(Note: Remember this email address and password as it is your username and password for your account).

3. Store Setup.

You get to see this page after you register and create a account. Click on Let's go button to setup the shop or you can set it up later from my account page.

or

You can also setup your store from store manager in myaccount page - only works after you register as a vendor.

4. Store Setup
  • Add your store logo if available.
  • Also add store banner image if available 

(Note: it is not mandatory only add it if available.)

5. Enter Store Details
  • Enter the Details of your shop.
  • like your shop name, store/personnel email address, mobile number, shop address, store city and pin code.

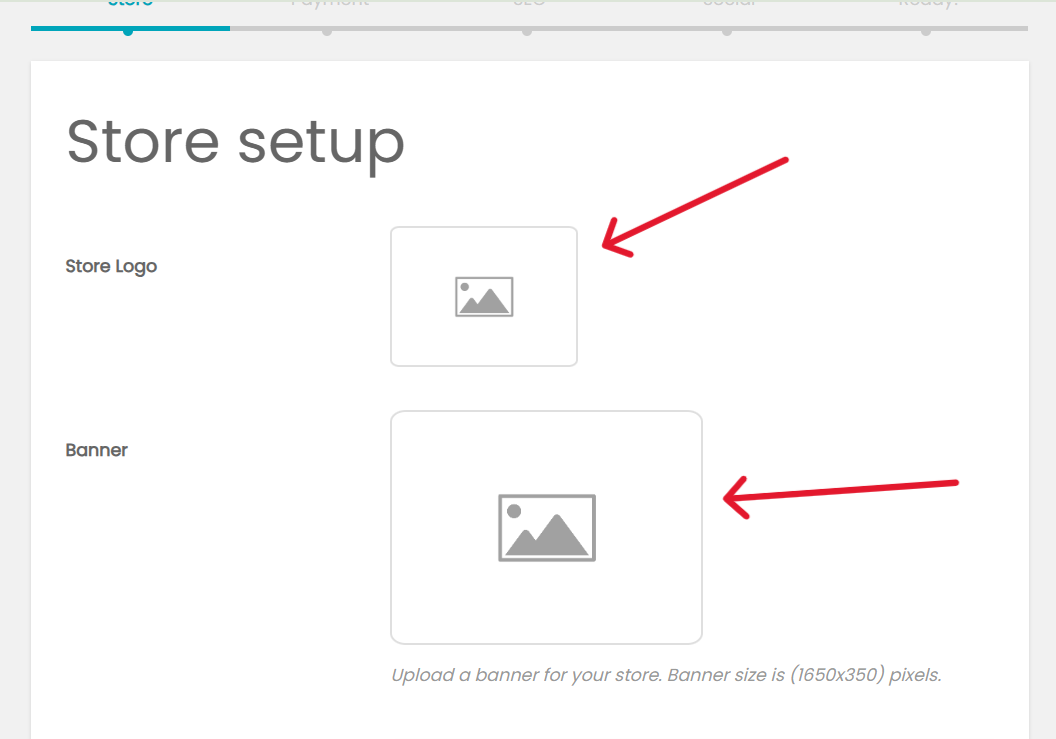
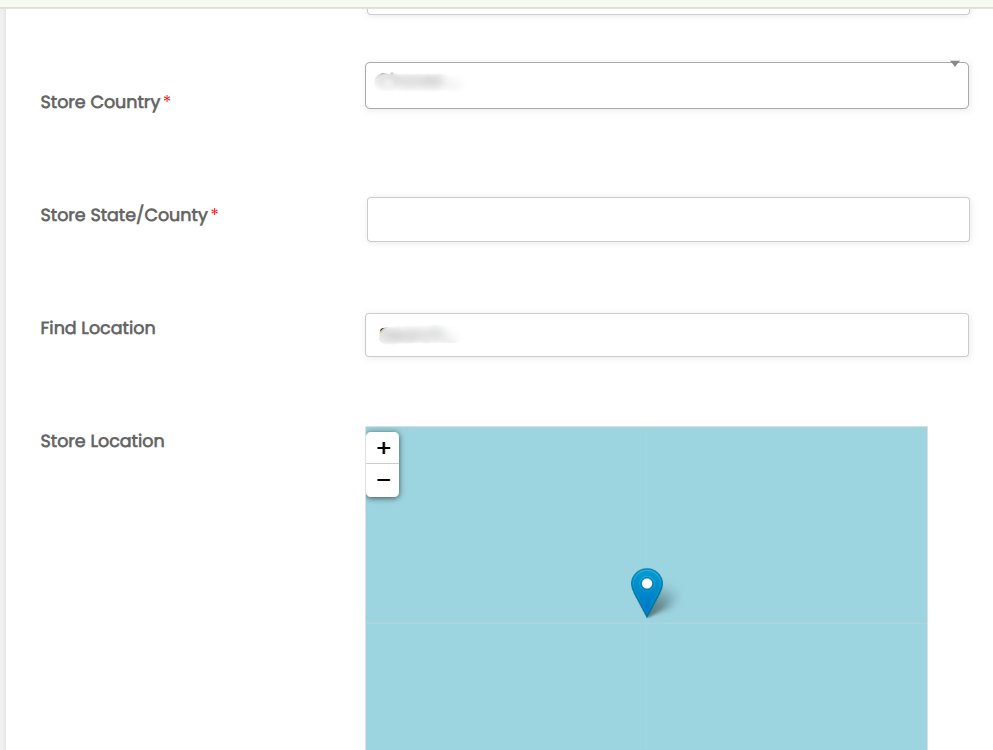
Enter Store country (Here-India) and state and enter your shop location in find location.

6. Payment Setup

Choose your mode of payment from bricbay.com to your account after the products is delivered.

Bank Transfer

If you choose bank transfer enter your shop account details like Account Name, Account Number, Bank Name, Bank Address.

No Need to worry about the Routing Number, IBAN, Swift code as it is not mandatory just enter the IFSC Code of your Bank
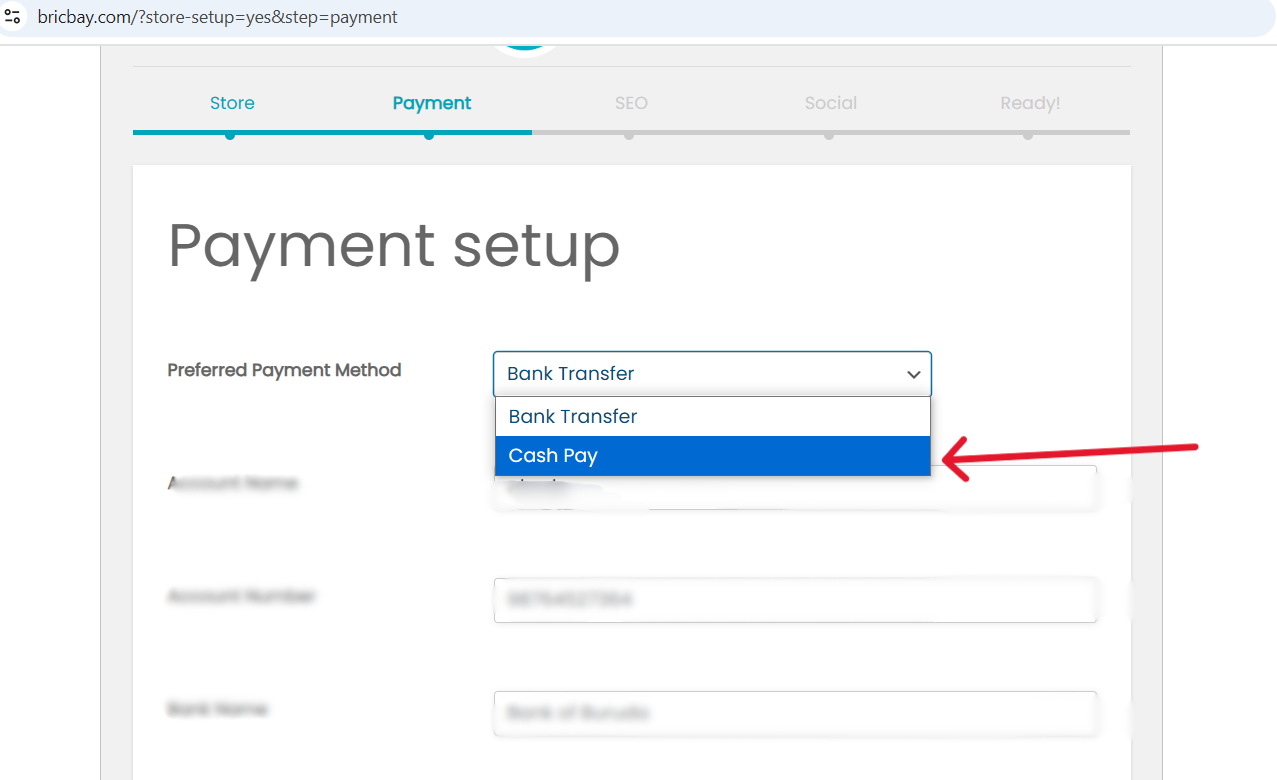
Cash Pay

The second option for receiving payments is through cash. You can choose it from the Preferred Payment Method.

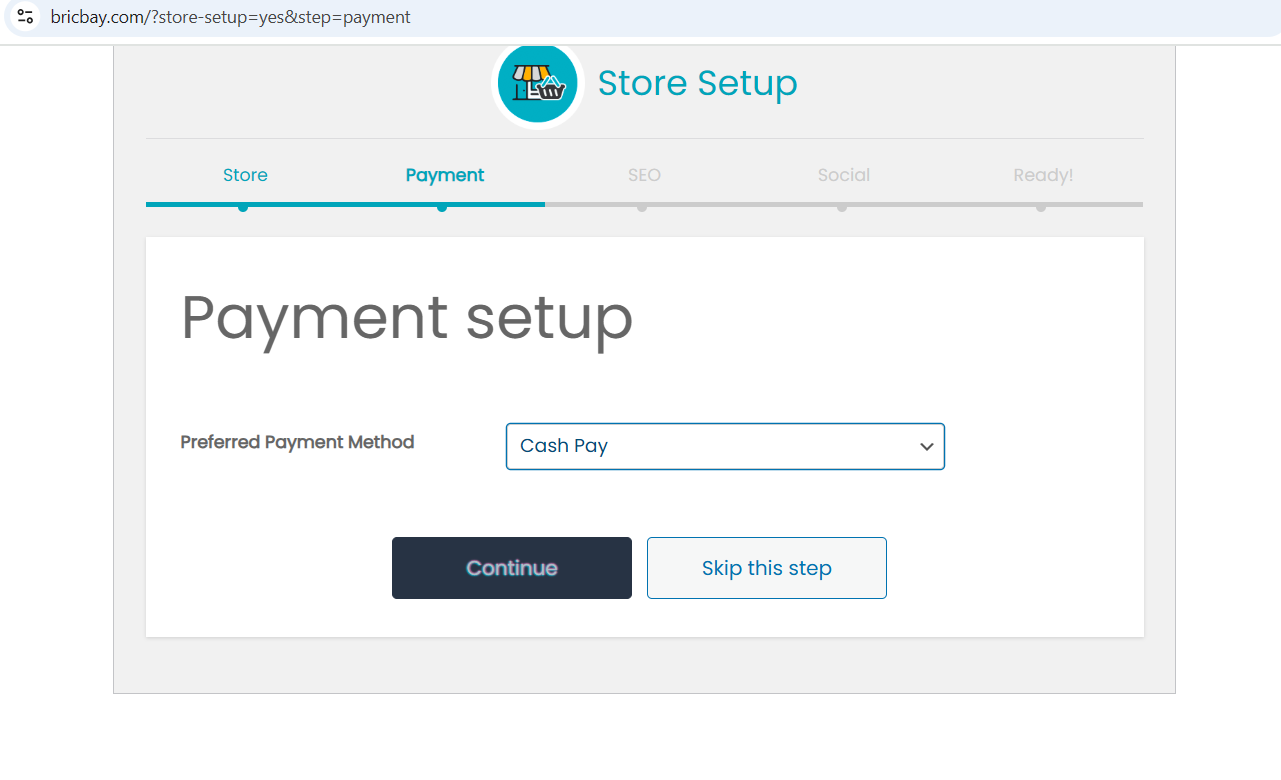
After choosing cash pay in preferred payment method you should see something like this directly and click on the continue button so the payment method is set.

"SEO and Social setup is not mandatory if required you can set it up by yourself."
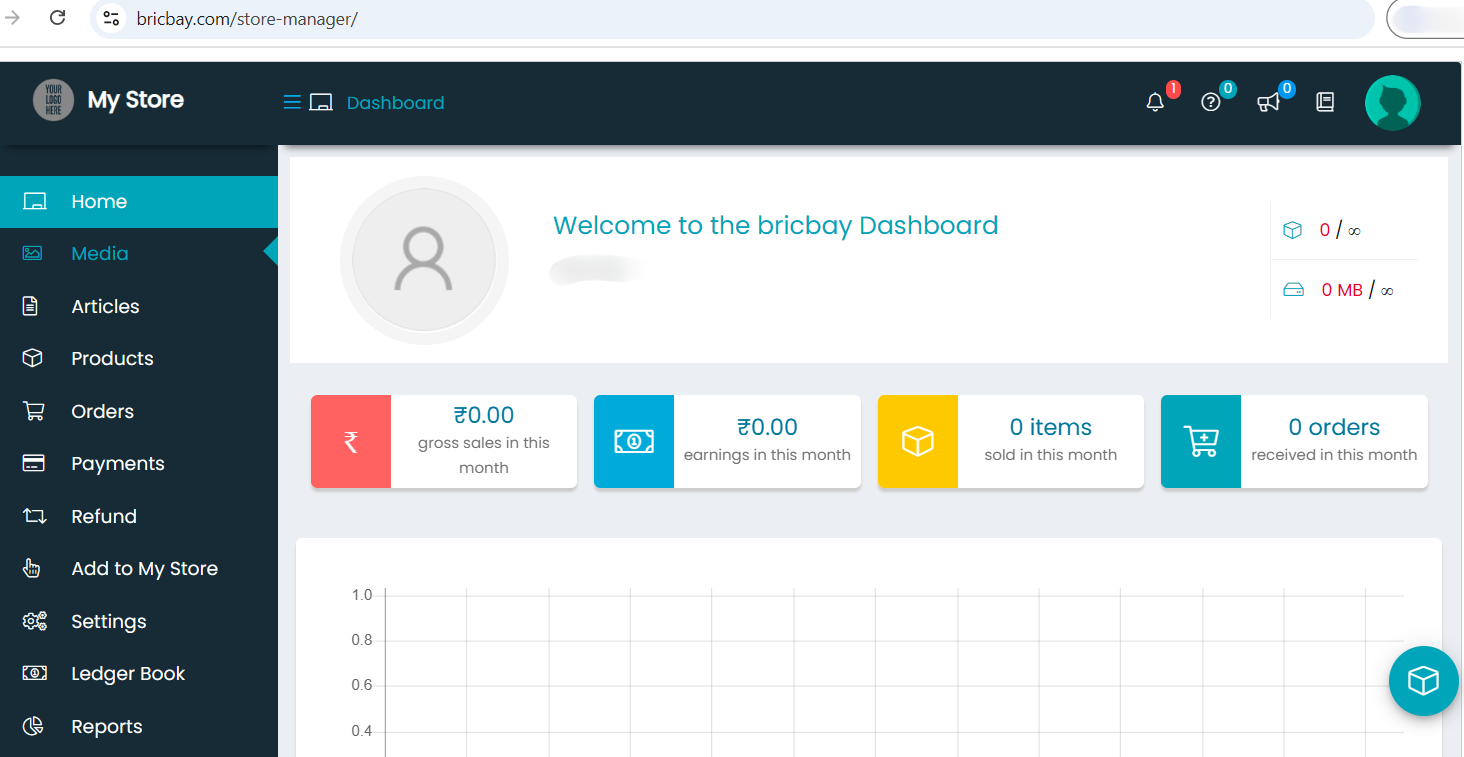
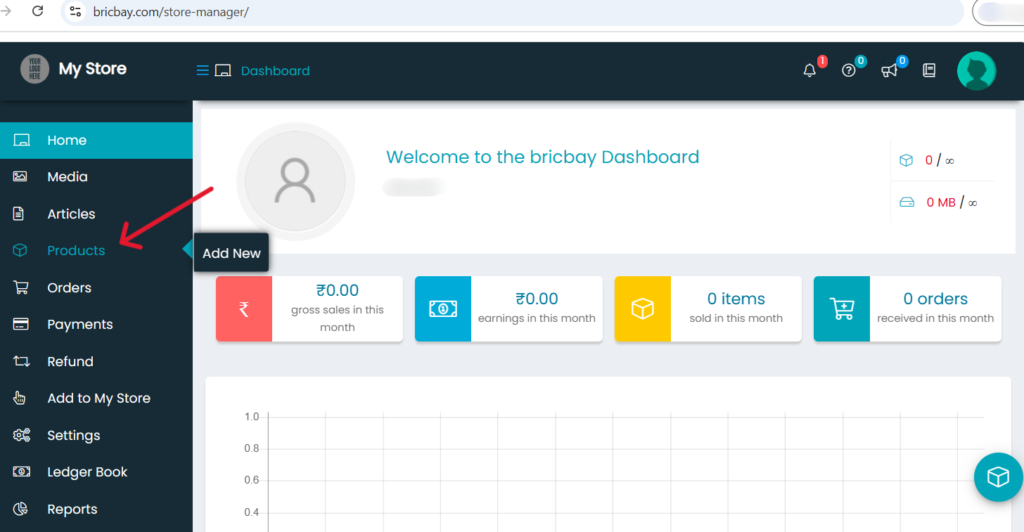
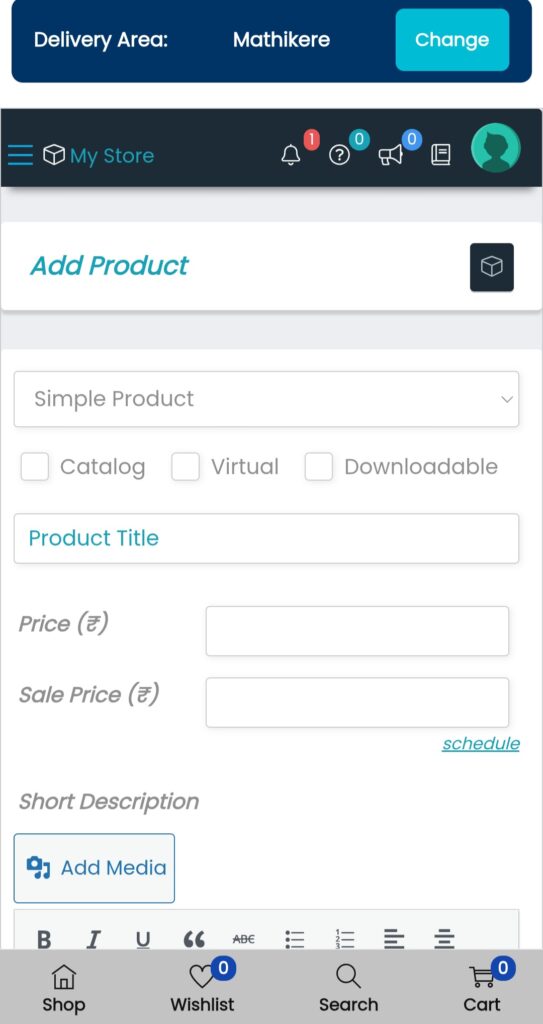
7. Store Manager Page - Dashboard

This is your Dashboard or Vendors Home Page. After setup you will get to see this page (the store manager page) or you can go to this page from myaccount --> store manager (but this works only when you are logged in through your vendor registered account).

8. View and add Products (In PC/Laptop)
  • Click on Products option.
  • Here is where you will add, edit or view products.
  • Here you can see an option called “Add New” this is where you can add your products.
  • Below in this list you can view your added products and also you can edit it from here.
Product Mobile -1
Add Products in Mobile.
  • Go to your dashboard and click on the 3 lines in the top left corner of the screen.
  • You will get a list of options.
  • In that choose Products, you will go to products page.
  • In that click on the icon as it is shown in the image below. 
  • Rest all is same as in the PC/Laptop.
Add Products
  • To add a product first enter the product title (Ex: CPVC Elbow, CPVC Pipe, Electrical Wire, etc.,).
  • Then add the Price of the product and sale price (For Ex: if the price of the product is Rs. 20 and sale price is Rs. 18 then customers will buy the product for Rs.18 and it will be displayed as Rs.18 with a discount Tag on the product page for the customers).
  • If no discount you can just enter the price itself and leave the sale price blank.
  • And to add the product image you need to click on the box in the right side which is compulsory.
  • Choose the category from the right side like if it is CPVC fittings choose CPVC Fittings or if it is electrical items choose Electrical Fittings or if it is pipes choose CPVC Pipes or SWR Pipes etc.,

(Note: the product image, product category are all important.)

Description
  • Add Short Description which means add any important information about the product in 1 or 2 points.
  • Add description like some information about the product.
  • This description is not compulsory.
  • If added it will be shown to the customer in product page.
  • And also add Brands of the products in right side.
  • In Tags add words related to products (Ex: for CPVC pipe add tags like pipe, water pipe, cpvc pipe, etc.,
Inventory
  • Add Stock Keeping Unit (SKU) (for ex: cprk001 where cprk indicates ‘cpvc‘ product ‘rk‘ represents your shop name and ‘001‘ is first product). It is just to give unique number to your product, you can maintain whatever you need.
  • Manage Stock – if checked the box it asks for total number of the product in your shop which will be shown in product page for customers).
  • In stock status choose In stock which means you have the product in your shop or else choose sold out.
  • Don’t check the box of sold individually. If checked you can only sell one product at a time for customers (Ex: Mr. X can select the product but cannot add 2 or 3 of the same product at once).
Shipping
  • No need to add weight and dimensions of product.
  • In Shipping class choose pipes for CPVC Pipes or electric pipes and for fittingschoose cpvc fittings or electric fittings which is in dropdown.
  • Just leave the Processing Time as it is “Ready to ship in”.
Tax
  • Tax Status – keep taxable if tax is applied to the product, if not choose non taxable.
  • Tax Class – choose tax class like GST 12%, 18%,etc.,
" Attributes, Linked and Product Policies is not mandatory "
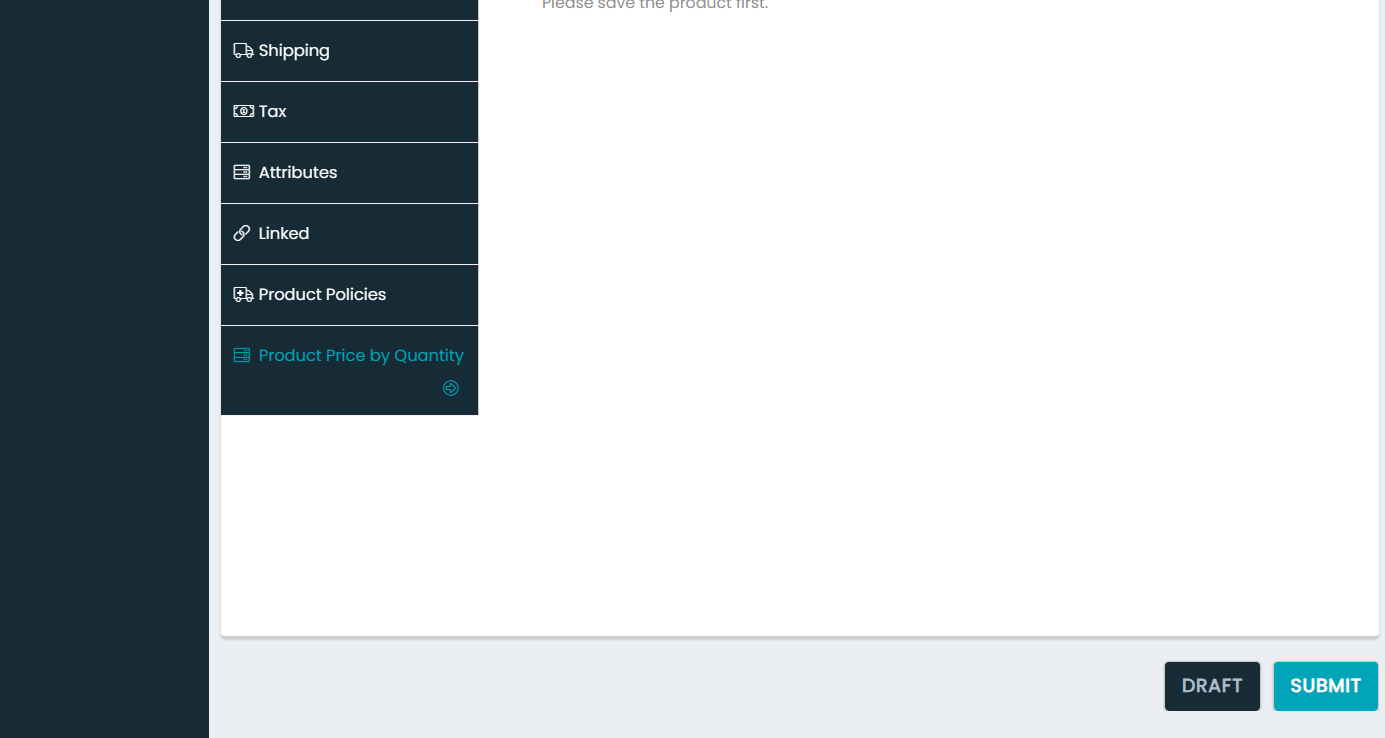
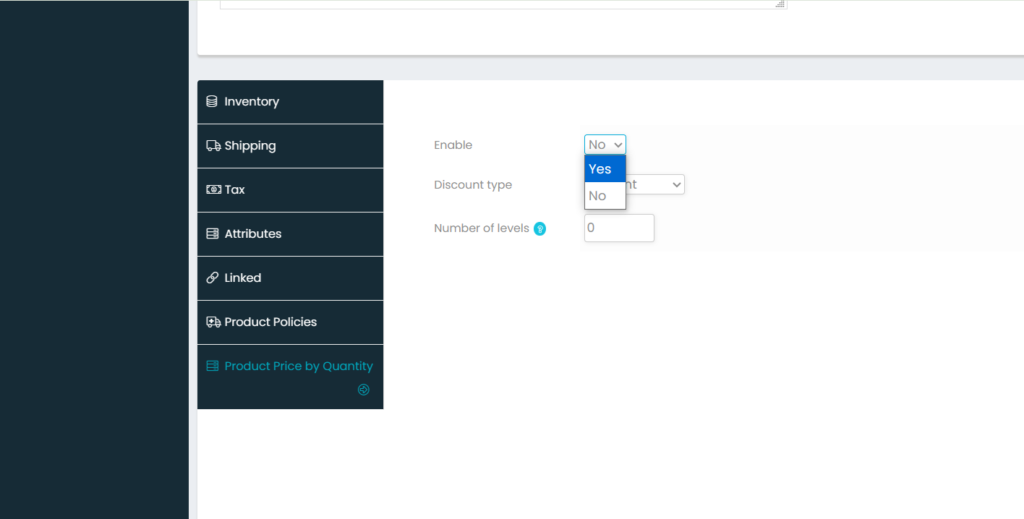
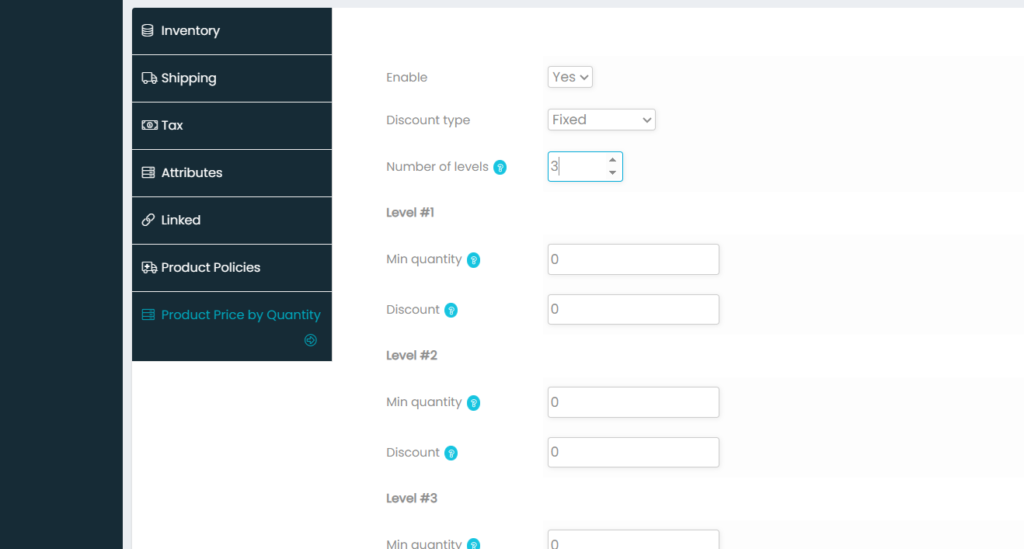
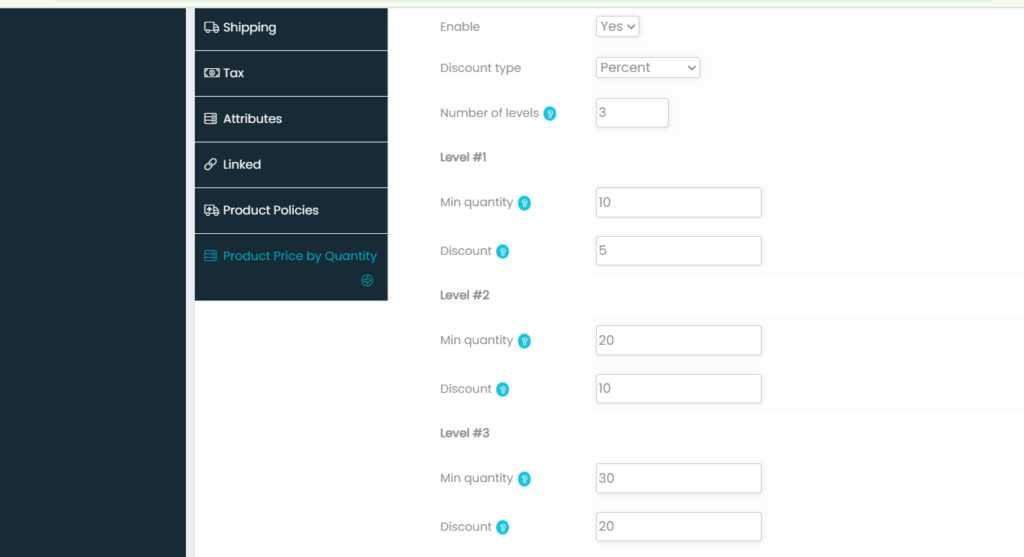
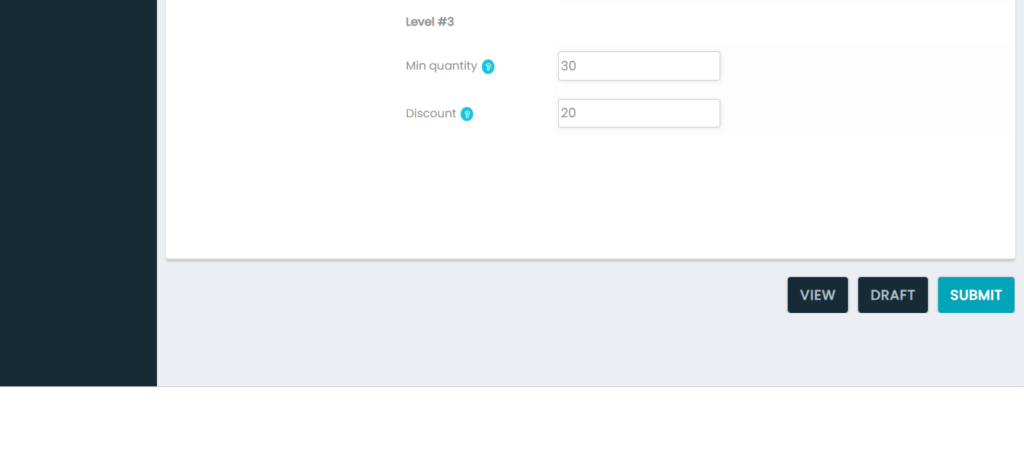
Product Price by Quantity or Bulk Pricing

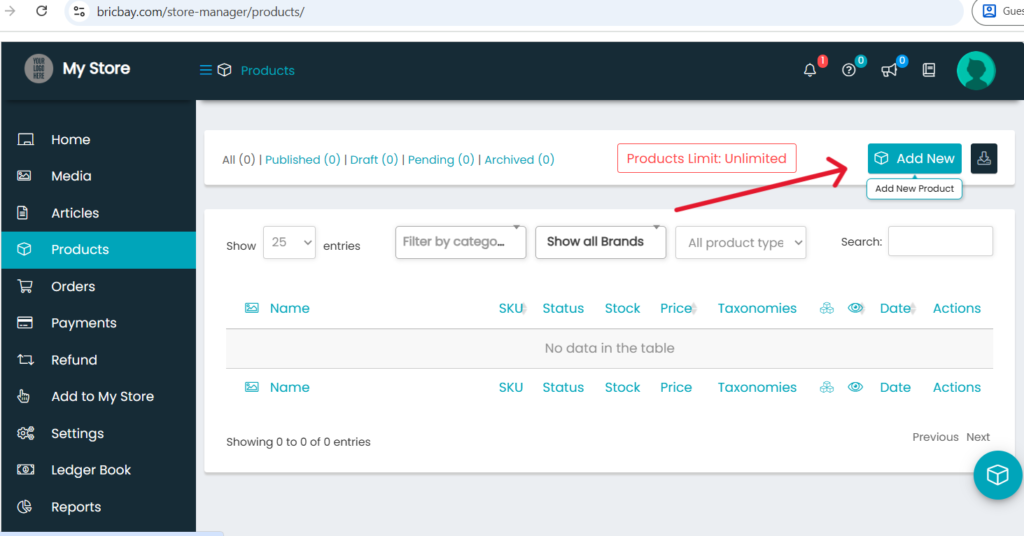
To Add price for bulk quantity you need to first submit the product.

  • After saving the product again go to the Price by Quantity option.
  • It asks to enable it or not please choose yes if the product has bulk pricing.
  • Then choose the discount type as fixed so that you can directly mention the price for bulk quantity.(For Ex: Let’s say for 1 piece it cost Rs.50 and for 10 pieces it costs Rs.40, so here the minimum quantity is 10 for which one piece costs Rs. 40).
  • Then mention the number of levels. The number of levels means the number of bulk quantites the prices vary (For Ex. if you mention number of level as 3 you need to enter 3 minimum quantities with their discount prices. Like for 10pieces price for each is Rs. 40 and for 20pieces price for each is Rs. 35 and for 30 & above pieces price for each is Rs. 30 etc.,)
  • And at last submit the product so that it will be displayed for customers to see.
(Note: You can see the bulk pricing in below images)

Shopping cart

0
image/svg+xml

No products in the cart.

Continue Shopping